Sunday, 22 June 2014

Summer Lookbook!


This is a post I have wanted to do for aaages. Way before I had my own blog, Lookbooks were the things I most enjoyed looking at. Despite having a massive clear out recently and banning myself from buying anymore clothes, I seem to have accidentally purchased/been given quite a few summery bits that I adore. Before I start I just want to say that I can only apologise for my hideous roots, fortunately I have had them done since taking these photos.


Casual/ Cute/ Going Out

Skirt - American Apparel (£46)
Top - Missguided (£9.99)
Bra - American Apparel (£6)
Sandals - Jack Wills (£39.50)


Casual

Skirt - H&M (£7.99)
Top - Topshop (£8)
Necklace - Unknown, but i have seen similar in Topshop
Sandals - Jack Wills (£39.50)
Bag - Jack Wills
Bra - American Apparel (£6)


Dressing Up

Playsuit - Missguided (£19.99)
Sandals - Jack Wills (£39.50)
Kimono - Missguided (£19.99)
Belt - Missguided (£6)


Casual

Shorts - Topshop (£32)
Sandals - Jack Wills (£39.50)
Bra - American Apparel (£6)
Stripy Top - H&M (£12.99)
Sunflower Shirt - American Apparel (£40)
Belt - Primark


Casual/ Going Out

Playsuit - Topshop (£35)
Sandals - Jack Wills (£39.50)
Kimono - Missguided (£19.99)


Casual/ Going Out

Dress - Missguided (£19.99?)
Sandals - Jack Wills (£39.50)

I'm a huge huge fan of dogtooth this season!


Really Dressing Up

Dress - Zara Kids Section (guys if you don't look at the Zara kids' you're crazy) (£25.99)
Heels - River Island (£55)


I'm not brave enough to post a picture of myself in this, but a bikini is a huge part of your summer wardrobe so I had to show you the one I bought last week! 
Topshop (£30)


Just a better view of the shoes featured. 


Monday, 9 June 2014

How To Make Healthy Pancakes!


Bit of a different post today! I don't know about you guys, but I looove pancakes. Like SO much. So when I found out about this recipe that is a bit 'healthier' than your day to day pancakes, I literally cried with excitement because it meant I could have them whenever I wanted without feeling guilty - not just as an occasional treat. They're made with entirely clean ingredients, have no added sugar and are packed with protein. However, I add chocolate chips so you should probably miss this part out if you want to be super super healthy...


What you'll need:
  • 2 medium eggs
  • 40g oats
  • 1 banana (around 100g)
  • 20g chocolate chips (optional, can be missed out entirely or replaced with blueberries, raspberries, 1tsp cocoa powder, 1tbsp peanut hottie etc) 
  • maple syrup (optional)

To start with, you need to blend your oats in a blender to create an oat 'flour'. After about 30 seconds it should look like the second photo (they don't have to be completely blended because you'll be blending them some more in a minute). 


Next, you should add your 2 eggs to the blender. Be really careful not to get any shell in, and if you do scoop it out with a spoon. I once - being lazy - left a bit of shell in the mixture thinking it would just get whizzed up, and I ended up cutting my lip... 


Now you need to mash your banana using a fork. Before mashing, I always pull those stringy bits off because they don't mash very well. It's best to use a really ripe banana because they're extra sweet and soft.


Once your banana is like a puree, add it to the blender along with the eggs and oats and blend it all together until it is completely smooth and there are no lumps.


Once it's blended, leave it to sit for around 5 minutes. During this time it kind of expands so that when you cook them they're so much fluffier and lighter! While you're waiting, put a frying pan on the hob on a high heat so that it is hot by the time you're ready to cook you pancakes. If you don't have a non-stick pan, you should use a little bit of oil - or 1cal oil spray like I do - otherwise they'll be almost impossible to flip.


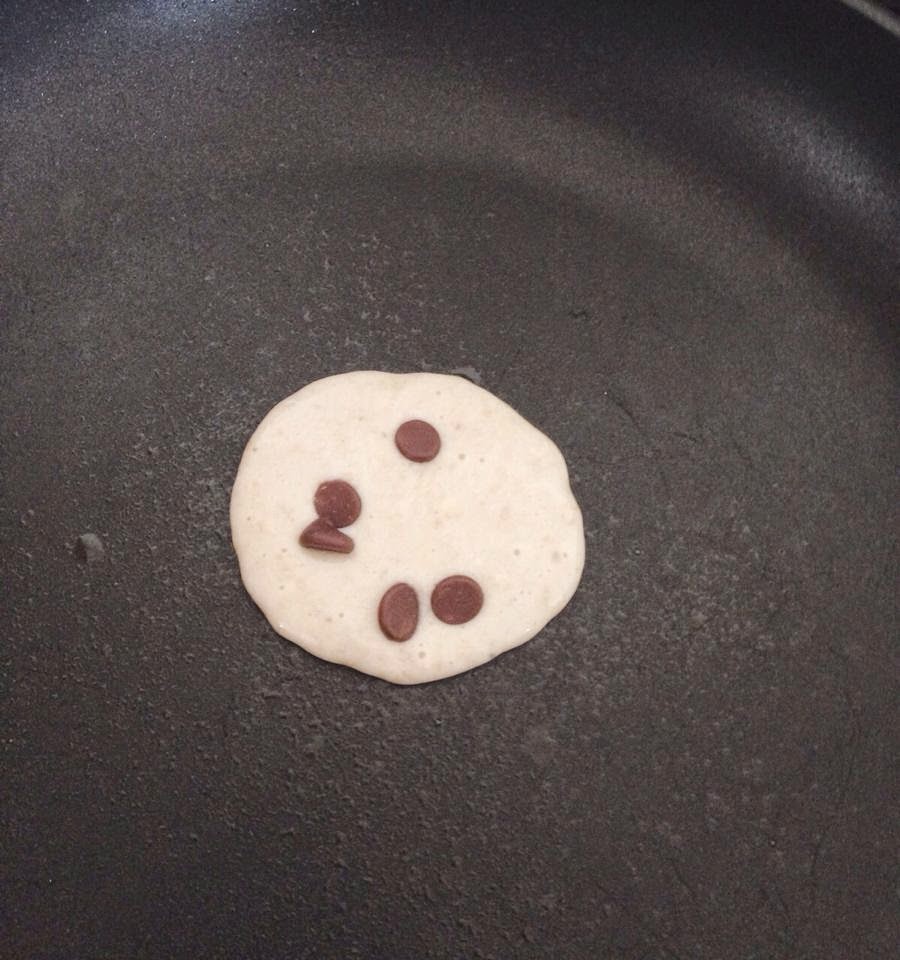
Weigh out your chocolate chips (or blueberries etc) next. You may be wondering why I don't just add the chocolate chips to the mixture, but the reason is that I find they just sink to the bottom of the container and so your first pancakes have no chocolate in and the last ones get it all! Your pan is probably hot enough by now, so you can turn it down to a medium heat (if you have it too high they'll burn). Take a table spoon of mixture and pour it into the pan, then take a few chocolate chips and sprinkle them on the pancake. Repeat this again by pouring another spoonful of mixture on top of that and then adding a few more chips (this ensures the chocolate is all the way through the pancake and not just on top).


You should be able to put 2 in a pan at a time. When they begin to bubble on the surface - usually after around 30 seconds to a minute - they're ready to flip! Do this using a spatular, but be gentle otherwise they'll be a disaster! They should be golden brown in colour.


Once you've used all the mixture (you should be able to make around 8 pancakes) it's time to add toppings! This time i just had maple syrup and blueberries, but you could have any fruit (extra banana is amazing) or peanut butter, chocolate sauce, nutella, even greek yoghurt... the possibilities are endless!


I think these are so delicious, so if you decide to make them, I hope you enjoy them as much as I do!
xxxxxxx


Sunday, 8 June 2014

How To Do Watermelon/Strawberry Nails!


I've had a lot of compliments on these nails and comments regarding how to do them on instagram, so I thought making a blog post would be the best way to explain! I tried to reply to the comments by explaining how you do them, but it made them sound so much more complicated when really they're soo easy. They're also really pretty and perfect for the summer which has all of a sudden made an appearance. You could probably try doing loads of other fruit designs, but these are the only two I've tried so far.

Watermelon:

To start with, make sure your nails are are filed into a round shape and that all previous nail varnish is removed. Next, instead of using a base coat, I always paint my nails white.


This particular one is very thin so I apply two coats, but you should only need one. Using white as a base colour makes the nail varnish you paint on top a lot brighter! If you don't want to use a white base, just use clear nail varnish.


Once you've got your base done and you've let it dry completely, add two coats of pink nail varnish (allowing the first coat to dry before adding the second). The colour I used was called 'Bright Pink' by Barry M.


When the pink is dry, it's time to paint the tips of your nails green. You can use a guide or even a piece of paper to do this, but I find it easier to just do free-hand. The green I used was 'Mint' by Barry M.


To do the black dots to look like the seeds, I just use a black nail varnish and press very lightly with the brush. You can use something like a bobby pin dipped in the nail varnish instead, but I'm too lazy.


Now all that's left is to paint clear nail varnish over them when they're dry to avoid chipping, and then remove the excess varnish that is on your fingers. I do this by dipping a cotton bud into nail varnish remover and rubbing it off.


Strawberry:

Again, start off by rounding your nails with a file and then painting them white. Once you're done and the nails are dry, paint them a bright red colour. 


Now is the hardest and fiddliest bit, but as long as you don't rush it it is still quite easy. Using a green colour (I used 'Mint' by Barry M, but this is a little light - a darker green would look better) for the leaves, you need to paint half a circle in each top corner of the nail, and then a straight line to join them together (see picture below).


Instead of doing dots on the strawberry's for the seeds, I like to do more of a thin black line. I find it easiest to do this by using something with a thin end, and just dipping it into the black varnish.


Finish by cleaning off the excess varnish on your fingers and coating with clear polish!


Told you they were easy to do! If anyone has any suggestions for a next blog post, it would be great if you could comment them on here or on my instagram! thanks xxxx